Views: 2
AWS Linux2では、amazon-linux-extras を使用する。
参考:【入門】nginx とは 設定方法を紹介
$ sudo amazon-linux-extras install nginx1 -y
$ sudo systemctl start nginx
$ sudo amazon-linux-extras install epel -y
$ sudo yum install fcgiwrap -y
インストール中:
 fcgiwrap      x86_64      1.1.0-12.20181108git99c942c.el7      epel       22 k
依存性関連でのインストールをします:
 fcgi          x86_64      2.4.0-25.el7                         epel       47 k
$ sudo yum install spawn-fcgi -y
================================================================================
 Package             アーキテクチャー   バージョン             リポジトリー   容量
================================================================================
インストール中:
 spawn-fcgi          x86_64          1.6.3-5.el7            epel           18 k
トランザクションの要約
================================================================================
$ sudo vim /etc/sysconfig/spawn-fcgi
```
OPTIONS="-u nginx -g nginx -s /var/run/fcgiwrap.socket -S -M 0770 -F 1 -P /var/run/spawn-fcgi.pid -- /usr/sbin/fcgiwrap"
```
$ sudo systemctl start spawn-fcgi

$ sudo vim /usr/share/nginx/html/test.py
```
#!/usr/bin/python3
import random
print("HTTP/1.0 200 OK")
print("Content-type: text/html\n")
print("ランダムな数字を表示します。")
print(random.random())
```
$ sudo chmod 755 /usr/share/nginx/html/test.py

$ sudo vim /etc/nginx/conf.d/fcgi.conf
```
server {
    listen       localhost:8080;
    location ~ \.py$ {
      root   /usr/share/nginx/html/; #$document_root
      fastcgi_pass unix:/var/run/fcgiwrap.socket;
      include           /etc/nginx/fastcgi_params;
      fastcgi_param     SCRIPT_FILENAME   $document_root$fastcgi_script_name;
    }
}
```
$ sudo systemctl restart nginx
$ curl localhost:8080/test.py
ランダムな数字を表示します。
0.7280845311460491
概要
シェルスクリプトでウェブアプリを開発、別のサーバへ展開するため実行環境設定を再確認したので、そのメモ。
PHPはphp-fpmというソフトとNginxを組み合わせてサービスを提供するが、ショルスクリプトをウェブアプリで動作させるには、fcgiwrapおよびspawn-fcgiというソフトを使用する。
fcgiwrap
fcgiインストール
[ec2-user]$ sudo yum install epel-release
[ec2-user]$ sudo yum install fcgi spawn-fcgi fcgi-devel
GitHubからfcgiwrapを入手してmakeする。
[root src]# wget http://github.com/gnosek/fcgiwrap/tarball/master -O fcgiwrap.tar.gz
[root src]# tar zxvf fcgiwrap.tar.gz
[root src]# cd gnosek-fcgiwrap-*
[root gnosek-fcgiwrap-99c942c]# autoreconf -i
[root gnosek-fcgiwrap-99c942c]# ./configure
[root gnosek-fcgiwrap-99c942c]# make && make install
cc -std=gnu99 -Wall -Wextra -Werror -pedantic -O2 -g3    fcgiwrap.c  -lfcgi  -o fcgiwrap
install -d -m 755 /usr/local/sbin
install -m 755 fcgiwrap /usr/local/sbin
install -d -m 755 /usr/local/man/man8
install -m 644 fcgiwrap.8 /usr/local/man/man8

[root gnosek-fcgiwrap-99c942c]# echo $?
0
# autoreconf -i
bash: autoreconf: コマンドが見つかりません
となったので、
# yum install autoconf autogen
インストール後
# autoreconf -i
Can’t exec “aclocal”: そのようなファイルやディレクトリはありません
となったので、
# yum install libtool
インストール後
# autoreconf -i
spawn-fcgi
fcgiwrapがインストールできたのでspawn-fcgiを起動しょうとしたが起動できない。:-)
[root gnosek-fcgiwrap-99c942c]# chkconfig spawn-fcgi on
[root gnosek-fcgiwrap-99c942c]# /etc/rc.d/init.d/spawn-fcgi start
[root gnosek-fcgiwrap-99c942c]# /etc/rc.d/init.d/spawn-fcgi status
fcgiwrap は停止しています
/etc/init.d/spawn-fcgiの修正。
fcgiwrapは、/usr/local/sbinに登録されていた。
SOCKET=”/var/run/fcgiwrap/fcgiwrap.sock”は、後述するようにfastcgi_pass 127.0.0.1:9001;としたので不要かな。
[root gnosek-fcgiwrap-99c942c]# vi /etc/init.d/spawn-fcgi

# Source function library.
. /etc/rc.d/init.d/functions

exec="/usr/bin/spawn-fcgi"
prog="spawn-fcgi"
config="/etc/sysconfig/spawn-fcgi"
cgi="/usr/local/sbin/fcgiwrap"

pid="/var/run/spawn-fcgi.pid"
SOCKET="/var/run/fcgiwrap/fcgiwrap.sock"

[ -e /etc/sysconfig/$prog ] && . /etc/sysconfig/$prog

lockfile=/var/lock/subsys/$prog

start() {
    [ -x $exec ] || exit 5
    [ -f $config ] || exit 6
    echo -n $"Starting $prog: "
    # Just in case this is left over with wrong ownership
    [ -n "${SOCKET}" -a -S "${SOCKET}" ] && rm -f ${SOCKET}
    daemon "$exec $OPTIONS >/dev/null"
    retval=$?
    echo
    [ $retval -eq 0 ] && touch $lockfile
    return $retval
}

stop() {
    echo -n $"Stopping $prog: "
    killproc $prog
    # Remove the socket in order to never leave it with wrong ownership
    [ -n "${SOCKET}" -a -S "${SOCKET}" ] && rm -f ${SOCKET}
    retval=$?
    echo
    [ $retval -eq 0 ] && rm -f $lockfile
    return $retval
}
ここで /etc/sysconfig/spawn-fcgiにOPTIONS指定。
OPTIONS="-u nginx -g nginx -a 127.0.0.1 -p 9001 -P /var/run/spawn-fcgi.pid -- /usr/local/sbin/fcgiwrap"
次の設定方法もあるようだがnginxのconfも修正したがうまく動作しなかった。
OPTIONS="-u nginx -g nginx -S -s /var/run/fcgiwrap/fcgiwrap.sock -C 32 -F 1 -P /var/run/spawn-fcgi.pid -- /usr/bin/php-cgi"
nginxのconf設定
OPTIONS指定に合わせて127.0.0.1:9001を指定する。
location ~ \.cgi$ {
    fastcgi_pass 127.0.0.1:9001;
    fastcgi_index index.cgi;
    fastcgi_param SCRIPT_FILENAME $document_root$fastcgi_script_name;
    include /etc/nginx/fastcgi_params;
}
上記設定でspawn-fcgiを起動できた。
[root gnosek-fcgiwrap-99c942c]# /etc/rc.d/init.d/spawn-fcgi start
spawn-fcgi を起動中:                                       [  OK  ]
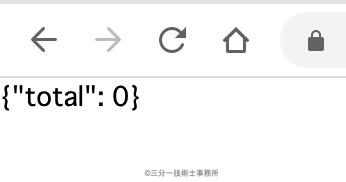
total0.cgiをサーバーに登録。
#!/bin/sh cat <
参考:
FCGI Wrap (Nginxサイトの記事)
NginxでCGI/PERLを動かす(FCGIWRAP+SPAWN-FCGI)(2016年)
WordPress を Nginx + Fast-cgi で動かす(Qiita 2014年)
